유니티 버전
2020.3.18f1
들어가기 전 참고
이 포스트는 아래의 동영상을 한국어로 재구성한 자료임을 밝힌다. 어느 정도 영어 청취가 가능하다면 동영상을 봐도 좋다. 그리고 여기에서 이어지는 강의이므로 이전 강의를 보지 않았다면 보고 오도록 하자.
이 포스트에서는 stencil shader로 전체 영역을 어둡게 만든 다음 가시 영역만 밝게 비추는 방법을 알아보도록 한다.
셰이더 스크립트 추가
Shaders 폴더를 만들고 StencilMask, StencilObject 총 2개의 Standard Surface Shader 스크립트를 추가한다.

각 스크립트의 내용을 다음과 같이 작성한다. 이 포스트에서 셰이더의 설명은 생략하도록 한다.
StencilMask.shader
Shader "Custom/StencilMask"
{
    Properties
    {
        _Color ("Color", Color) = (1,1,1,1)
        _MainTex ("Albedo (RGB)", 2D) = "white" {}
        _Glossiness ("Smoothness", Range(0,1)) = 0.5
        _Metallic ("Metallic", Range(0,1)) = 0.0
    }
    SubShader
    {
        Tags { "RenderType"="Opaque" "Queue"="Geometry-100" }
        ColorMask 0
        ZWrite off
        LOD 200

        Stencil
        {
            Ref 1
            Pass replace
        }

        CGPROGRAM
        // Physically based Standard lighting model, and enable shadows on all light types
        #pragma surface surf Standard fullforwardshadows

        // Use shader model 3.0 target, to get nicer looking lighting
        #pragma target 3.0

        sampler2D _MainTex;

        struct Input
        {
            float2 uv_MainTex;
        };

        half _Glossiness;
        half _Metallic;
        fixed4 _Color;

        // Add instancing support for this shader. You need to check 'Enable Instancing' on materials that use the shader.
        // See https://docs.unity3d.com/Manual/GPUInstancing.html for more information about instancing.
        // #pragma instancing_options assumeuniformscaling
        UNITY_INSTANCING_BUFFER_START(Props)
            // put more per-instance properties here
        UNITY_INSTANCING_BUFFER_END(Props)

        void surf (Input IN, inout SurfaceOutputStandard o)
        {
            // Albedo comes from a texture tinted by color
            fixed4 c = tex2D (_MainTex, IN.uv_MainTex) * _Color;
            o.Albedo = c.rgb;
            // Metallic and smoothness come from slider variables
            o.Metallic = _Metallic;
            o.Smoothness = _Glossiness;
            o.Alpha = c.a;
        }
        ENDCG
    }
    FallBack "Diffuse"
}
StencilObject.shader
Shader "Custom/StencilObject"
{
    Properties
    {
        _Color ("Color", Color) = (1,1,1,1)
        _MainTex ("Albedo (RGB)", 2D) = "white" {}
        _Glossiness ("Smoothness", Range(0,1)) = 0.5
        _Metallic ("Metallic", Range(0,1)) = 0.0
    }
    SubShader
    {
        Tags { "RenderType"="Opaque" }
        LOD 200

        Stencil
        {
            Ref 1
            Comp equal
        }

        CGPROGRAM
        // Physically based Standard lighting model, and enable shadows on all light types
        #pragma surface surf Standard fullforwardshadows

        // Use shader model 3.0 target, to get nicer looking lighting
        #pragma target 3.0

        sampler2D _MainTex;

        struct Input
        {
            float2 uv_MainTex;
        };

        half _Glossiness;
        half _Metallic;
        fixed4 _Color;

        // Add instancing support for this shader. You need to check 'Enable Instancing' on materials that use the shader.
        // See https://docs.unity3d.com/Manual/GPUInstancing.html for more information about instancing.
        // #pragma instancing_options assumeuniformscaling
        UNITY_INSTANCING_BUFFER_START(Props)
            // put more per-instance properties here
        UNITY_INSTANCING_BUFFER_END(Props)

        void surf (Input IN, inout SurfaceOutputStandard o)
        {
            // Albedo comes from a texture tinted by color
            fixed4 c = tex2D (_MainTex, IN.uv_MainTex) * _Color;
            o.Albedo = c.rgb;
            // Metallic and smoothness come from slider variables
            o.Metallic = _Metallic;
            o.Smoothness = _Glossiness;
            o.Alpha = c.a;
        }
        ENDCG
    }
    FallBack "Diffuse"
}
스카이 박스 수정 및 셰이더 적용
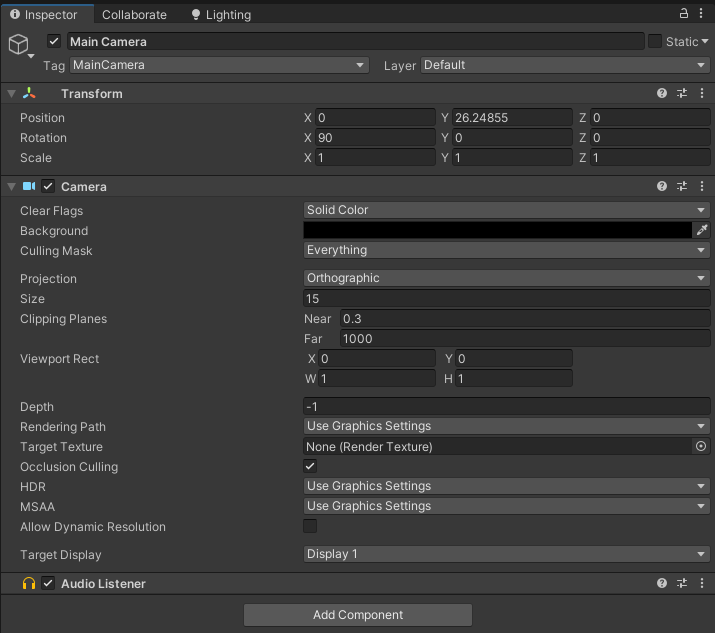
메인 카메라의 Clear Flags를 Solid Color로 바꾸고 배경을 흑색으로 바꾼다.
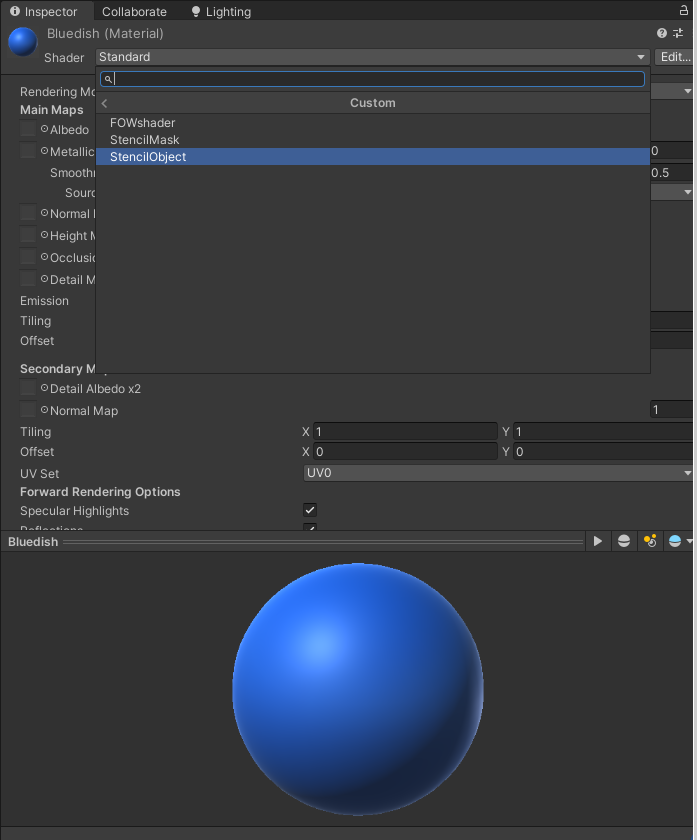
적, 장애물, 바닥 오브젝트에 사용된 머터리얼에 대해 StencilObject 셰이더를 적용한다.
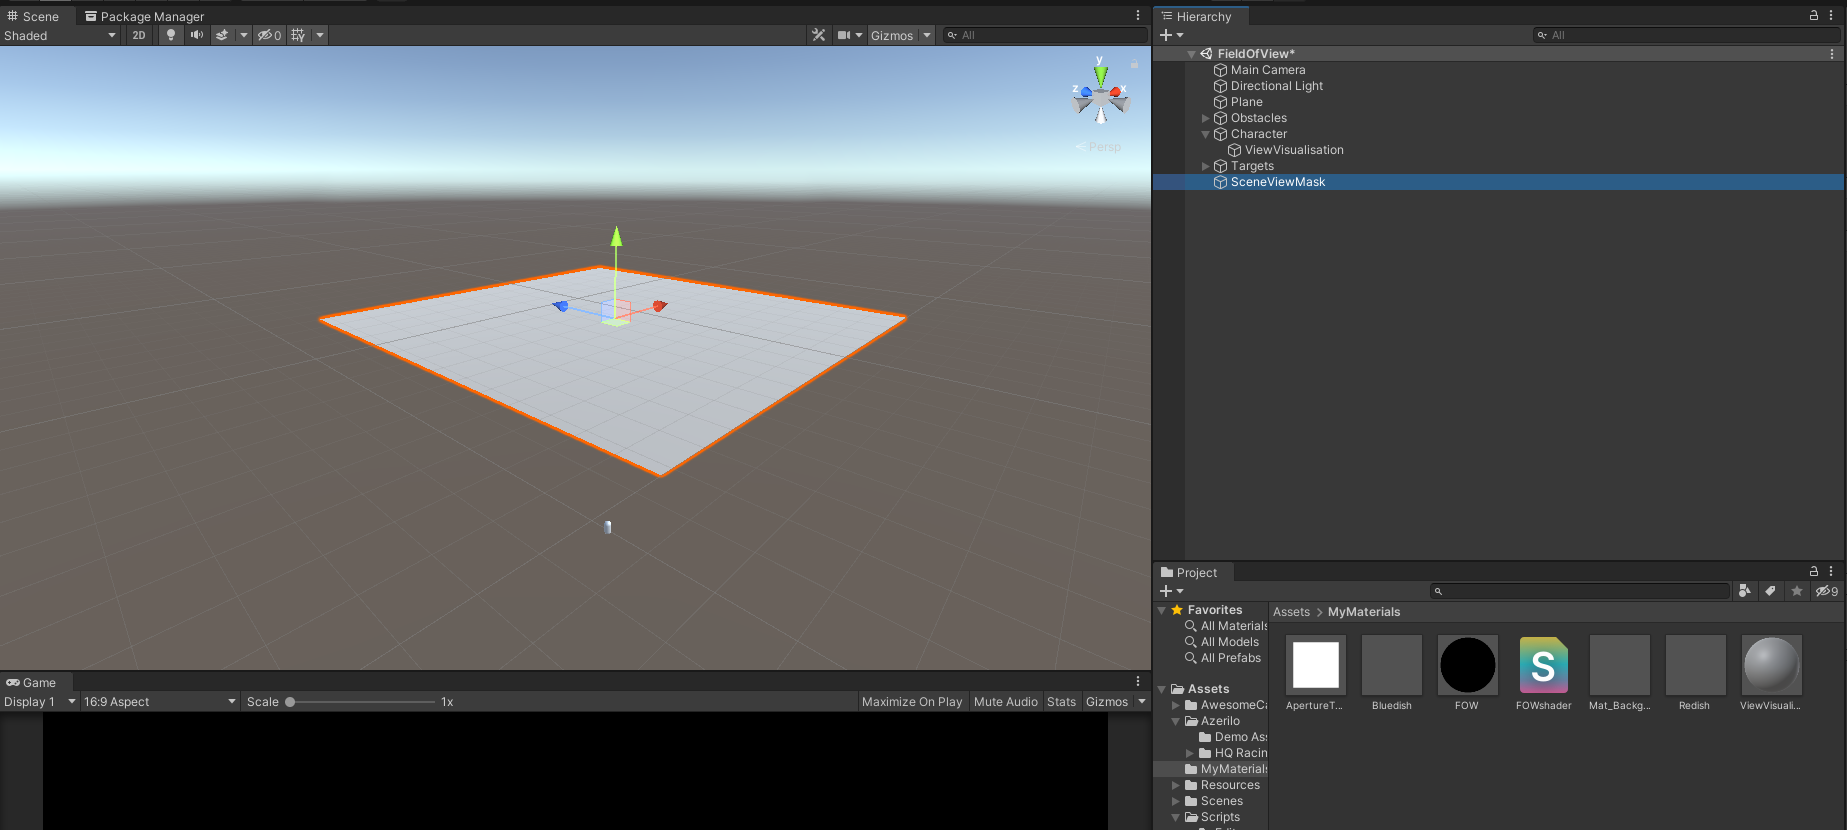
그러면 렌더링 화면과 유니티 씬에서 다음과 같이 Character를 빼고 아무것도 보이지 않는다.

이렇게 되면 씬에서 보이는 것이 없어 불편하다. 이 에피소드에서는 불편함을 해소하기 위해 StencilMask 셰이더를 활용한다. 우선 카메라보다 y좌표가 높은 위치에 Plane을 하나 추가하고 머터리얼을 시각화 오브젝트에 쓰인 ViewVisualisation으로 바꾼다.
그다음 ViewVisualiation 머터리얼의 셰이더를 StencilMask로 바꾸면
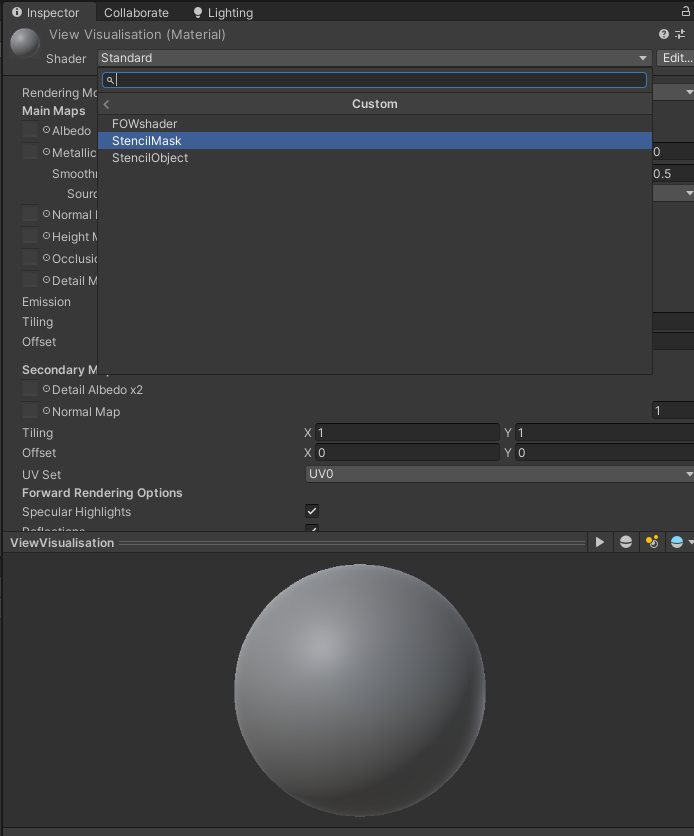
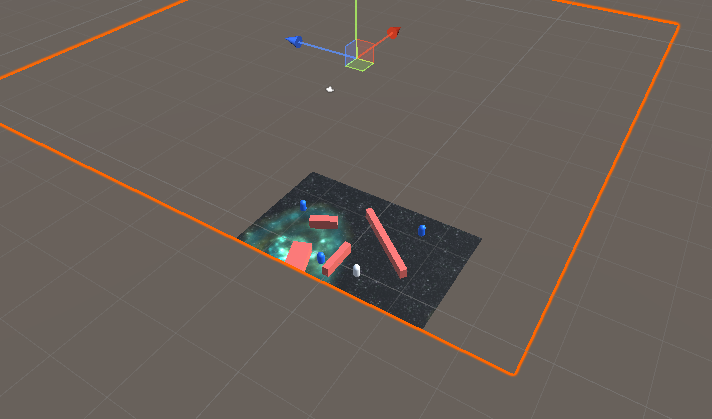
이처럼 Plane에 투과된 오브젝트를 볼 수 있게 된다.
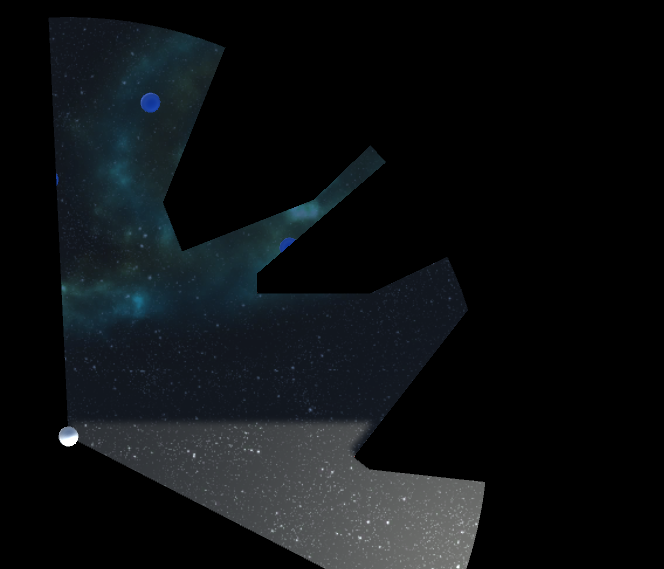
이제 씬을 실행하면 아래와 같이 StencilMask 셰이더가 적용된 영역을 비추면서 어둠 속의 시야를 구현하게 된다.
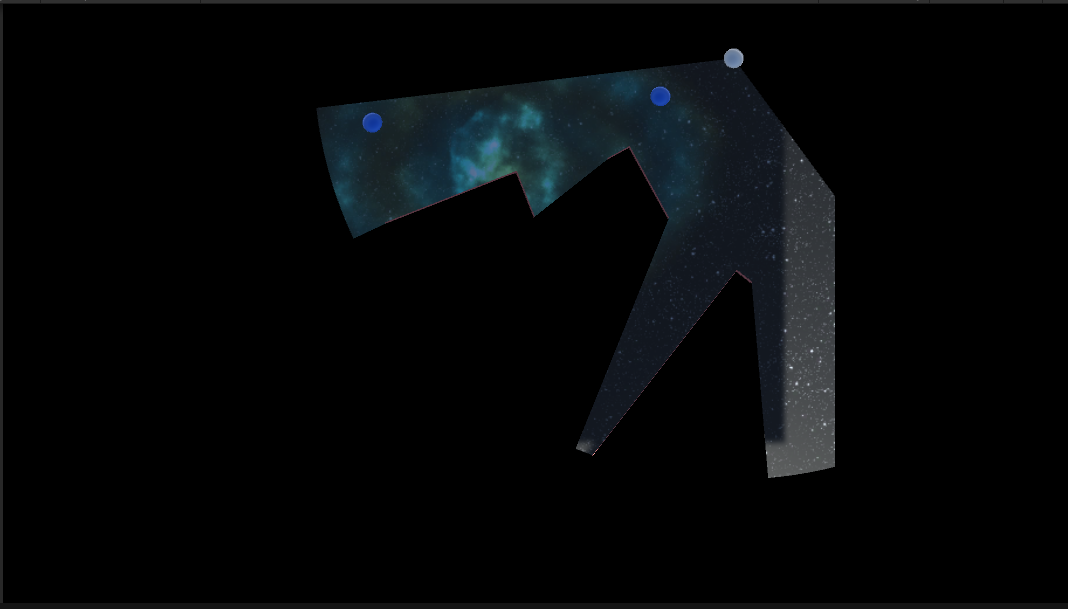
여기서 멈춰도 충분하지만 폴리곤 메쉬를 구축할 때 정점을 조금 더 뒤로 밀어서 모서리를 보게 하는 방법이 있다. FieldOfView.cs에 float 변수로 maskCutawayDst라는 변수를 넣고 적절한 값을 넣자.
public float maskCutawayDst = .1f;
그리고 DrawFielOfView 메서드에서 정점을 구축할 때 각 좌표마다 변수 값을 곱한 forward 벡터를 더해주면 모서리를 보게 할 수 있다.
vertices[i + 1] = transform.InverseTransformPoint(viewPoints[i]) + Vector3.forward * maskCutawayDst;
이렇게 3개의 에피소드 동안 캐릭터에 시야를 만들어내는 과정을 끝냈다. 방법을 잘 익히고 있으면 추후 전장의 안개라던지 캐릭터의 시야를 제한할 필요가 있는 부분을 효과적으로 구현할 수 있을 것이다.
보너스 - 전장의 안개
전장의 안개를 제대로 구현하고 싶다면 다음을 참조한다.
https://nicotina04.tistory.com/266
유니티 Fog of War 전장의 안개 구현하기
이 포스트에서는 아래의 저장소 소스코드를 토대로 통해 전장의 안개를 구현하는 한 가지 방법을 제시한다. https://github.com/LeLocTai/Fog-of-war GitHub - LeLocTai/Fog-of-war Contribute to LeLocTai/Fog-of..
nicotina04.tistory.com
'Unity Engine > 자료 번역' 카테고리의 다른 글
| 유니티 Procedural Cave Gerneration 랜덤 동굴 생성 1 (1) | 2022.09.11 |
|---|---|
| Memory Management in Unity 유니티 메모리 관리 번역 (2) | 2022.09.10 |
| 유니티 Fog of War 전장의 안개 구현하기 (0) | 2022.09.09 |
| 유니티 Field Of View 유닛 시야 구현하기 2 (0) | 2022.03.04 |
| 유니티 Field Of View 유닛 시야 구현하기 1 (0) | 2022.02.26 |


